
 Helpful Posts:
 Lesson 1 - Backgrounds / Locations
Lesson 2 - Lighting
Lesson 3 - Positioning - Lighting - Taking the Shot
Lesson 4a - Initial post-processing - Part 1
Lesson 4b - Initial post-processing - Part 2
Lesson 5 - Introduction to Flash & Some Inspiration!
Lesson 6 - Introduction to Basic Studio Lighting
Lesson 7 - Introduction to Gels
Lesson 8 - Taking it to the next level
Edit: If you're just joining us, please feel free to either pop your portrait into the Lesson 8 thread, or just create a new thread in the People & pets forum.
Results 1 to 20 of 26
-
29th December 2010, 10:02 AM #1

- Join Date
- Dec 2008
- Location
- New Zealand
- Posts
- 17,660
- Real Name
- Have a guess :)
School of Portraiture - Links to Lessons 1 through 8
Last edited by Colin Southern; 30th September 2011 at 03:30 AM.
-
27th February 2012, 11:13 AM #2New Member
- Join Date
- Feb 2012
- Posts
- 2
Re: School of Portraiture - Links to Lessons 1 through 8

My many thanks to everyone for a great Fall school season.
Now that we are through the winter holidays we can breath deeply in knowing that the first half of the school year is through. Before we know it, it will be spring. This means spring portraits, cap and gown, outdoor sessions, the works.
I am busy working on the Spring setting; much like the fall setting, this one will include the backdrop artwork of a California artist and a setting that corresponds with the season. Our artist from last fall, Mary Welch was extremely successful. I had more people complementing me on the setting than perhaps ever before.
As I move through the next few years of school portrait photography you�ll see an increasing devotion to providing portraits that are not being done in schools today. Our sets are improving, our delivery time grows shorter, our online delivery system quick and easy and most importantly, the faces I photograph fresh, innocent and beautiful.
I would also like to welcome this year the Merced County State Preschool program. I had the distinct pleasure of working with their five preschools in the rural areas of Merced county. The children were, as children are, a delight to work with and I look forward to a long relationship with them.
This year also marked a milestone for me and JA Photography. The very first school I ever photographed, The Growing Tree in Stockton and I celebrated the start of 25 years together. They were my very first account and we remain together even still. There is an odd feeling when a young woman or man approaches you, says that not only am I photographing their child but I photographed them when they attended. That�s a lot of water under the bridge.
I�ll keep this blog open and hopefully fresh. Check back and see what�s new.
I am looking forward to seeing you all again soon.
-
29th December 2012, 10:14 PM #3New Member
- Join Date
- Dec 2012
- Posts
- 2
Re: School of Portraiture - Links to Lessons 1 through 8
Thanks for all the lessons. They were great and helpful to get a better insight of the field.
-
14th March 2013, 10:26 PM #4New Member
- Join Date
- Mar 2013
- Posts
- 1
Re: School of Portraiture - Links to Lessons 1 through 8
Thanks
-
19th December 2013, 06:59 AM #5

- Join Date
- Sep 2013
- Location
- Brisbane, Australia
- Posts
- 275
- Real Name
- Dean

Re: School of Portraiture - Links to Lessons 1 through 8
Hi Colin Originally Posted by Colin Southern

I have just read through all the lessons, sorry for re-opening an old topic but this great thread was written 2 and a half years before I picked up my DSLR for the first time. I have read a lot of written materials online in the last 6 months but this has to be the most concise and laymans terms article I have ever come across. I love portraitures photography and have been learning for an about half a year now and I wish Id discovered this article earlier. I have a few questions and I hope you dont mind I am asking.
1. With kicker light & hair light, how do stop strobe flash spill from hitting the camera? Do you use barn doors or other gobos to stop this spillage?
2. In relation to shooting mode, I shoot manual mode most of time and always in studio but with outdoor events like birthdays and family picnics, I am a bit slow in manual mode because of metering adjustment and whatnot. I know practice makes perfect and RAW captures have large adjustment degrees but I am wondering if you ever shoot AV mode (Aperture Priority) for events say weddings or engagement parties which require faster capture turn around time to seize special moments and AV mode would be preferable for such events
Thanks for taking the time to compose these great lessons
Dean
-
19th December 2013, 08:58 AM #6
- Join Date
- Dec 2008
- Location
- New Zealand
- Posts
- 17,660
- Real Name
- Have a guess :)
Re: School of Portraiture - Links to Lessons 1 through 8
Hi Dean, Originally Posted by dragon76
Thanks for the kind words. It seems like a lifetime ago that I wrote that series!
To answer your questions ...
Hair lights aren't normally a problem as they're (well) out of frame, above, to one side, and slightly behind the subject. I normally use a beauty disk with a medium grid on a boom arm. The issue there isn't spill hitting the camera, it's the correct power and positioning of the light to illuminate the hair, but not put any undesirable lighting onto other areas (especially the face) (the overall exposure is governed buy the sum of any overlapping lights (eg if the key, fill, and hair lights all hit a common area of skin then that area will be brighter than if just key and fill lights had hit it - therefore the exposure will need to be adjusted, which inturn has an effect on the rest of the image) (it sounds tricky in theory, but in practice there's quite a bit of leeway -- you just have to be a little careful though).1. With kicker light & hair light, how do stop strobe flash spill from hitting the camera? Do you use barn doors or other gobos to stop this spillage?
Kicker lights are more challenging. Normally I'll put a medium grid on them, and then flag them off. HOW I flag them off depends on how they're positioned; I have a couple of approx 3 foot square flags attached to Velbon tripods (I knew I'd finally find a use for them!) - sometimes I can put them between the model and the light (but off to the side) so the flash can hit the model, but not the camera. Other times I'll bring a couple of 4' x 8' polystyrene sheets on wheels that I have in front of me (one side painted white, the other black) and just shoot through the gap in the middle. It's a bit clunky, but works well.
In the studio it's manual mode 100% of the time, but for location shoots, it's Av mode 100% of the time; heck the automation is there to make my life easier, so I might as well use it! Having just said that though, I also use off-camera flash lighting extensively (6x Canon 600EX-RT and a ST-E3-RT) (into a couple of softboxes) - meaning I can basically light anything. In that situation the only downside is that in Av mode the camera will regulate the shutterspeed to expose the background correctly - and that can mean all kinds of shutterspeeds (the flashes normally are just there to "top up" the ambient light. Sometimes I'm at 1/2000th (outdoors - sunny day - F2.8) other days 1/20th (indoors - poor lighting - F5.6). On the latter days it's a juggle of ISO / shutterspeed / flash.2. In relation to shooting mode, I shoot manual mode most of time and always in studio but with outdoor events like birthdays and family picnics, I am a bit slow in manual mode because of metering adjustment and whatnot. I know practice makes perfect and RAW captures have large adjustment degrees but I am wondering if you ever shoot AV mode (Aperture Priority) for events say weddings or engagement parties which require faster capture turn around time to seize special moments and AV mode would be preferable for such events
Does that help?
Best advice I can give for location shooting is to arm yourself with good flash gear and know how to use it.
-
19th December 2013, 08:58 AM #7
- Join Date
- Dec 2008
- Location
- New Zealand
- Posts
- 17,660
- Real Name
- Have a guess :)
Re: School of Portraiture - Links to Lessons 1 through 8
Hi Dean, Originally Posted by dragon76
Thanks for the kind words. It seems like a lifetime ago that I wrote that series!
To answer your questions ...
Hair lights aren't normally a problem as they're (well) out of frame, above, to one side, and slightly behind the subject. I normally use a beauty disk with a medium grid on a boom arm. The issue there isn't spill hitting the camera, it's the correct power and positioning of the light to illuminate the hair, but not put any undesirable lighting onto other areas (especially the face) (the overall exposure is governed buy the sum of any overlapping lights (eg if the key, fill, and hair lights all hit a common area of skin then that area will be brighter than if just key and fill lights had hit it - therefore the exposure will need to be adjusted, which inturn has an effect on the rest of the image) (it sounds tricky in theory, but in practice there's quite a bit of leeway -- you just have to be a little careful though).1. With kicker light & hair light, how do stop strobe flash spill from hitting the camera? Do you use barn doors or other gobos to stop this spillage?
Kicker lights are more challenging. Normally I'll put a medium grid on them, and then flag them off. HOW I flag them off depends on how they're positioned; I have a couple of approx 3 foot square flags attached to Velbon tripods (I knew I'd finally find a use for them!) - sometimes I can put them between the model and the light (but off to the side) so the flash can hit the model, but not the camera. Other times I'll bring a couple of 4' x 8' polystyrene sheets on wheels that I have in front of me (one side painted white, the other black) and just shoot through the gap in the middle. It's a bit clunky, but works well.
In the studio it's manual mode 100% of the time, but for location shoots, it's Av mode 100% of the time; heck the automation is there to make my life easier, so I might as well use it! Having just said that though, I also use off-camera flash lighting extensively (6x Canon 600EX-RT and a ST-E3-RT) (into a couple of softboxes) - meaning I can basically light anything. In that situation the only downside is that in Av mode the camera will regulate the shutterspeed to expose the background correctly - and that can mean all kinds of shutterspeeds (the flashes normally are just there to "top up" the ambient light. Sometimes I'm at 1/2000th (outdoors - sunny day - F2.8) other days 1/20th (indoors - poor lighting - F5.6). On the latter days it's a juggle of ISO / shutterspeed / flash.2. In relation to shooting mode, I shoot manual mode most of time and always in studio but with outdoor events like birthdays and family picnics, I am a bit slow in manual mode because of metering adjustment and whatnot. I know practice makes perfect and RAW captures have large adjustment degrees but I am wondering if you ever shoot AV mode (Aperture Priority) for events say weddings or engagement parties which require faster capture turn around time to seize special moments and AV mode would be preferable for such events
Does that help?
Best advice I can give for location shooting is to arm yourself with good flash gear and know how to use it.
-
20th December 2013, 01:45 AM #8
- Join Date
- Sep 2013
- Location
- Brisbane, Australia
- Posts
- 275
- Real Name
- Dean
Re: School of Portraiture - Links to Lessons 1 through 8
Once again, if someone like me with a bit of knowledge about Shutter speed, Aperture and ISO would appreciate this series immensely Originally Posted by Colin Southern
Thanks I will keep an eye on the shutter speed. I have 2 Nikon speed lights at the moments (SB-600 & SB-910) which do an ok job lighting the subject and the ambient light took care of the rest. Although most of my location shoots (by the way I like the term) were during gold hours and in wide open spaces back drop (i.e. beaches). Wow 6 x Cannon 600EX, I have seen a few evening shots done in city streets and buildings where both the model and building were lit up nicely with couples of 600EX off in softbox sticks and a nice ambient sky in the back ground. It was stunningHair lights aren't normally a problem as they're (well) out of frame, above, to one side, and slightly behind the subject. I normally use a beauty disk with a medium grid on a boom arm. The issue there isn't spill hitting the camera, it's the correct power and positioning of the light to illuminate the hair, but not put any undesirable lighting onto other areas (especially the face) (the overall exposure is governed buy the sum of any overlapping lights (eg if the key, fill, and hair lights all hit a common area of skin then that area will be brighter than if just key and fill lights had hit it - therefore the exposure will need to be adjusted, which inturn has an effect on the rest of the image) (it sounds tricky in theory, but in practice there's quite a bit of leeway -- you just have to be a little careful though).
Kicker lights are more challenging. Normally I'll put a medium grid on them, and then flag them off. HOW I flag them off depends on how they're positioned; I have a couple of approx 3 foot square flags attached to Velbon tripods (I knew I'd finally find a use for them!) - sometimes I can put them between the model and the light (but off to the side) so the flash can hit the model, but not the camera. Other times I'll bring a couple of 4' x 8' polystyrene sheets on wheels that I have in front of me (one side painted white, the other black) and just shoot through the gap in the middle. It's a bit clunky, but works well.
In the studio it's manual mode 100% of the time, but for location shoots, it's Av mode 100% of the time; heck the automation is there to make my life easier, so I might as well use it! Having just said that though, I also use off-camera flash lighting extensively (6x Canon 600EX-RT and a ST-E3-RT) (into a couple of softboxes) - meaning I can basically light anything. In that situation the only downside is that in Av mode the camera will regulate the shutterspeed to expose the background correctly - and that can mean all kinds of shutterspeeds (the flashes normally are just there to "top up" the ambient light. Sometimes I'm at 1/2000th (outdoors - sunny day - F2.8) other days 1/20th (indoors - poor lighting - F5.6). On the latter days it's a juggle of ISO / shutterspeed / flash.
I have been watching online seminars and strolling through forums for months but never got a clear confirmation from a pro perspective until now. I will go out and put this to practice and hopefully post some images here for further advice. Once again thank you, as an Aussie slang saying: "you're a dead set legend"=Does that help?
Best advice I can give for location shooting is to arm yourself with good flash gear and know how to use it.
Dean
-
20th December 2013, 03:17 AM #9
- Join Date
- Dec 2008
- Location
- New Zealand
- Posts
- 17,660
- Real Name
- Have a guess :)
Re: School of Portraiture - Links to Lessons 1 through 8
No worries Dean, Originally Posted by dragon76
Keep in mind that this is just the way I do it - others will almost certainly have all kinds of approaches. My personal opinion is that often "natural light" sucks; during the day its hard and contrasty - at night it's colour temp is all over the place, and inside levels are often low and/or yucky temperature/spiky -- hence the reason I just like to replace the crappy light with my own.
Pop along to Niel van Niekirk's blog and sign-up - I think you'd like his style.
http://neilvn.com/tangents/
-
22nd December 2013, 09:48 AM #10
- Join Date
- Sep 2013
- Location
- Brisbane, Australia
- Posts
- 275
- Real Name
- Dean
Re: School of Portraiture - Links to Lessons 1 through 8
Hi Colin Originally Posted by Colin Southern
I like Niel Van's style a lot. It's natural but yet dramatic. I have enclosed a high key shot of my beautiful daughter that I have done on the weekend. Love to have your opinion about it. I didn't have much time so there wasn't much time invested in posing.
Cheers
Dean

-
22nd December 2013, 10:11 AM #11
- Join Date
- Dec 2008
- Location
- New Zealand
- Posts
- 17,660
- Real Name
- Have a guess :)
Re: School of Portraiture - Links to Lessons 1 through 8
Hi Dean, Originally Posted by dragon76
I'm off to bed in a few minutes, so this will be quick ...
Pretty good all round, but just a few quick things.
1. It's not really high-key - it's pretty close to just normal key. The key refers to the key lighting; not the background lighting - so simply having a white background doesn't make it high-key, just normal key with a white background. In the same way as having a black background doesn't make it low-key.
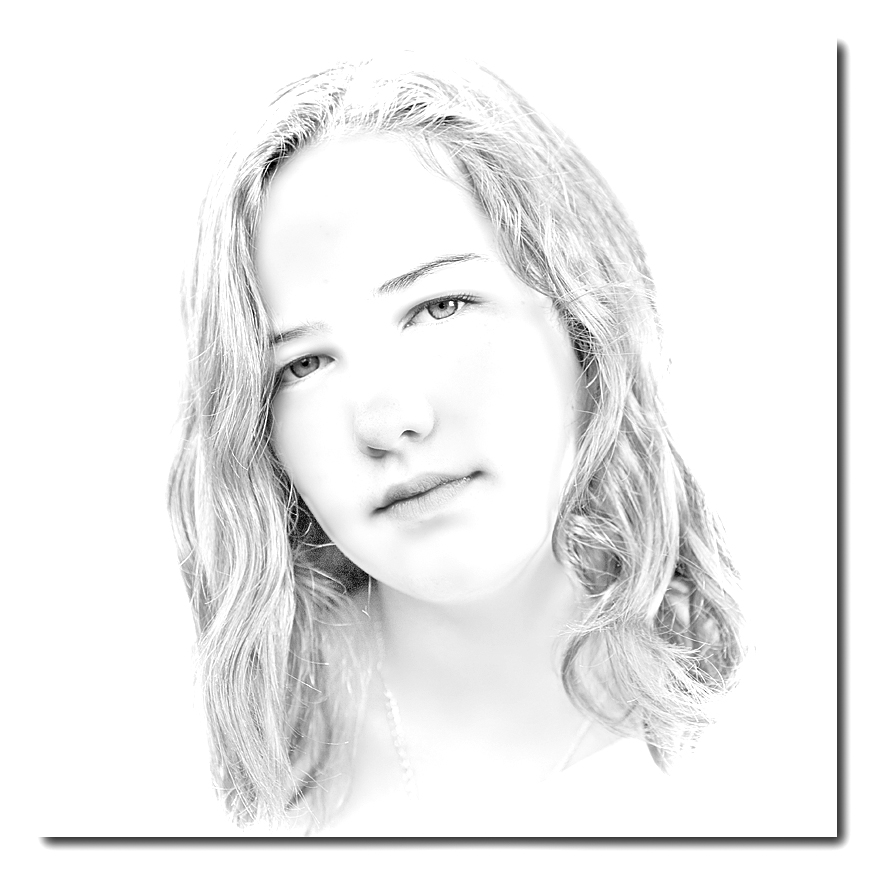
This is a high-key photo ...
2. Your logo wrenches the eye away from the subject; my strong suggestion is to avoid them. Some people tolerate them better than others, but a poll I ran here not too long ago suggests that the vast majority HATE them. For me, it's like having a beautiful multi-million dollar super car ... with a bird dropping on the hood; it may only be something small, but it totally ruins everything.
3. Colours look good, but it looks a little flat; that IS a side-effect of a high-key image (so in that respect it's a little high-key if you intended it that way), but personally I suspect it would look better if you set your black clipping point a bit higher.
4. I think you've forgotten to apply output sharpening after down-sampling; something like 0.3px @ 50 to 100% would improve the sharpness (whilst still retaining softness).
5. Looks like you've lit the background separately (which is a good thing) (either that or what I'm about to mention has been created in PP), but when you light backgrounds it's important to still expose them normally - no more than 1/3 stop higher; They'll still be white if the background is white to start with - any higher and you'll nuke fine hair detail as has happened here. Some folks say to over-expose it by 2 stops; sometimes you have to do that if your background is a wrinkled sheet, but it'll be at the expense of fine hair detail if present. This is where a light meter is invaluable (when you start working multi-light zones).
6. Lighting itself is quite flat which normally one would want to avoid, but it's not as big a sin with a symmetrical shot like this.
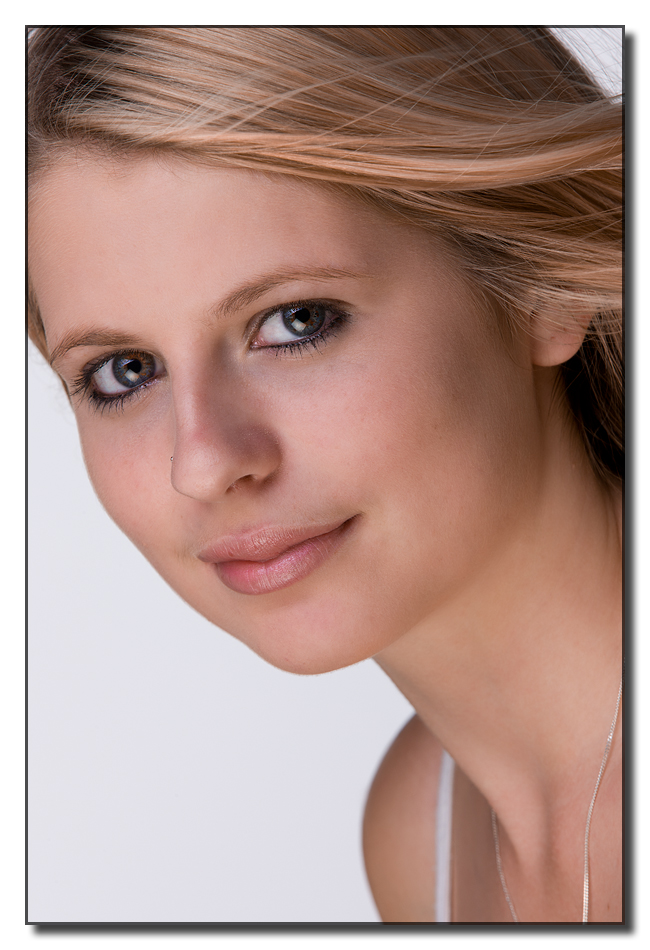
Here's one of mine that you can compare the above-mentioned points against:
Hope this helps!
-
22nd December 2013, 10:14 AM #12
- Join Date
- Dec 2008
- Location
- New Zealand
- Posts
- 17,660
- Real Name
- Have a guess :)
Re: School of Portraiture - Links to Lessons 1 through 8
PS: Neil has 3 books out that you might enjoy -- all available on Kindle if you're an iPad guy like me.
-
22nd December 2013, 12:04 PM #13
- Join Date
- Sep 2013
- Location
- Brisbane, Australia
- Posts
- 275
- Real Name
- Dean
Re: School of Portraiture - Links to Lessons 1 through 8
You are absolutely correct. it is not really high key. Originally Posted by Colin Southern
I don't like it too and I couldn't really care less about recognition or anything like that but I thought by including it large enough it would deter people from miss use this image should it ever get into bad folks hands (maybe I am too paranoid).
2. Your logo wrenches the eye away from the subject; my strong suggestion is to avoid them. Some people tolerate them better than others, but a poll I ran here not too long ago suggests that the vast majority HATE them. For me, it's like having a beautiful multi-million dollar super car ... with a bird dropping on the hood; it may only be something small, but it totally ruins everything.
Man you're good. I did forget to sharpen it in PS. About back ground, I have 3 strobes system and I did over expose it by 2 or 2.5 stops from subject with 2 strobes and 1 key light in the front. I purchased the white back drop on Friday and did not have time to iron it so blowing it out would save lots of time. Also, I don't like spending a lot of time doing PP when I can have more time going outside to get more shooting experience so no PP with back ground. I do own a Sekonic meter. I know what you mean about the hair details. Maybe I should move subject a bit further from the back drop and reduce back ground exposure.
3. Colours look good, but it looks a little flat; that IS a side-effect of a high-key image (so in that respect it's a little high-key if you intended it that way), but personally I suspect it would look better if you set your black clipping point a bit higher.
4. I think you've forgotten to apply output sharpening after down-sampling; something like 0.3px @ 50 to 100% would improve the sharpness (whilst still retaining softness).
5. Looks like you've lit the background separately (which is a good thing) (either that or what I'm about to mention has been created in PP), but when you light backgrounds it's important to still expose them normally - no more than 1/3 stop higher; They'll still be white if the background is white to start with - any higher and you'll nuke fine hair detail as has happened here. Some folks say to over-expose it by 2 stops; sometimes you have to do that if your background is a wrinkled sheet, but it'll be at the expense of fine hair detail if present. This is where a light meter is invaluable (when you start working multi-light zones).
6. Lighting itself is quite flat which normally one would want to avoid, but it's not as big a sin with a symmetrical shot like this.
Here's one of mine that you can compare the above-mentioned points against:
That's one natural and sharp portrait with nice shadow dimension on the right. Great shot. I will try again but sharpness is my main issue. focus zone is at eye level and my aperture normally around 5.6 to 8 at ISO 100 so I dont know what the issue is. The only thing that I could think of is the focal length rule. I am using Nikon 70-200 so my ISO should be at 200.
Is that shot with an 85mm? or 135mm? or 70-200mm? it's beautiful
Thanks again.
Dean
-
23rd December 2013, 06:47 AM #14
- Join Date
- Dec 2008
- Location
- New Zealand
- Posts
- 17,660
- Real Name
- Have a guess :)
Re: School of Portraiture - Links to Lessons 1 through 8
Not everyone agrees with me on this, but I've personally never understood the logic of ruining a photo for 99.99 percent of people on the off-chance that 0.01% may (or may not) want to steal it. Also, have a guess as to how long it would take to remove the logo? Originally Posted by dragon76
I'd suggest changing to seamless instead - it's a whole lot easier.About back ground, I have 3 strobes system and I did over expose it by 2 or 2.5 stops from subject with 2 strobes and 1 key light in the front. I purchased the white back drop on Friday and did not have time to iron it so blowing it out would save lots of time.
It won't help much (if at all) because the background is still just as bright, and moving the subject forward is more for minimising colour spill. The (A) answer is to use seamless and meter it to around 1/3 stop brighter than the foreground exposure; light meters save a lot of time when you start working multi-light zones.Also, I don't like spending a lot of time doing PP when I can have more time going outside to get more shooting experience so no PP with back ground. I do own a Sekonic meter. I know what you mean about the hair details. Maybe I should move subject a bit further from the back drop and reduce back ground exposure.
In the studio I'm never shooting below F11, and even then DoF can be an issue (I shoot as high as F22). Lack of sharpness can be a number of things:That's one natural and sharp portrait with nice shadow dimension on the right. Great shot. I will try again but sharpness is my main issue. focus zone is at eye level and my aperture normally around 5.6 to 8 at ISO 100 so I dont know what the issue is. The only thing that I could think of is the focal length rule. I am using Nikon 70-200 so my ISO should be at 200.
- Camera shake if the lighting is a mix of ambient and flash.
- Camera shake if the lighting is underpowered and has quite a long flash duration
- Lens issue
- sub-optimal sharpening workflow
- Focus (AF) issue.
Hard to say without looking at an unprocessed (RAW) shot (feel free to flick me one if it helps)
Holly's shot was 1/125 @ F11 @ ISO 100 @ 200MM (FF).Is that shot with an 85mm? or 135mm? or 70-200mm? it's beautiful
Here's another since she has a fan

-
23rd December 2013, 12:07 PM #15
- Join Date
- Sep 2013
- Location
- Brisbane, Australia
- Posts
- 275
- Real Name
- Dean
Re: School of Portraiture - Links to Lessons 1 through 8
Colin Good point Originally Posted by Colin Southern
Do you mean paper?. my is muslin cotton
I'd suggest changing to seamless instead - it's a whole lot easier.
It won't help much (if at all) because the background is still just as bright, and moving the subject forward is more for minimising colour spill. The (A) answer is to use seamless and meter it to around 1/3 stop brighter than the foreground exposure; light meters save a lot of time when you start working multi-light zones.
I thought contrast was lost due to spillage from over exposed back ground but I will do 1/3 stop higher and any creases will be fixed in PP.
I am always at 1/125. I tested lens with a single point focus and It is okIn the studio I'm never shooting below F11, and even then DoF can be an issue (I shoot as high as F22). Lack of sharpness can be a number of things:
- Camera shake if the lighting is a mix of ambient and flash.
- Camera shake if the lighting is underpowered and has quite a long flash duration
- Lens issue
- sub-optimal sharpening workflow
- Focus (AF) issue.
As I am still new here how would I go about sending the RAW file to you
Hard to say without looking at an unprocessed (RAW) shot (feel free to flick me one if it helps)
I like this one too!Holly's shot was 1/125 @ F11 @ ISO 100 @ 200MM (FF).
Here's another since she has a fan
Cheers
Dean
-
23rd December 2013, 12:38 PM #16
- Join Date
- Dec 2008
- Location
- New Zealand
- Posts
- 17,660
- Real Name
- Have a guess :)
Re: School of Portraiture - Links to Lessons 1 through 8
Yes - paper. It's wrinkle free - hell of a lot easier to work with. Muslin (or canvas) is OK if you want some texture, but it's a PITA if you're just after plain white. Originally Posted by dragon76
Having just said that though, it's only a tiny zone you need to work on; anything that's "100% person" you can ignore and everything that's "100% background" you can easily nuke with a brush, but it's just the transitional area in between that the problem, and that comes down to the subject. If it's a bald headed guy then it's easy, but if it's lots of fine hair - especially when it's blown with a fan - you just can't do a darned thing with it in PP. If you reduce the exposure in PP to reveal the detail then the white bits are under-exposed and it looks blotchy, whereas if you leave it over-exposed you lose the fine hair detail. Whereas if you expose it correctly then everything pretty much just slips into place.
When you think about it - in post-processing you'll be pushing things that should be white to 255 to stop the image looking flat - and if it's exposed properly then that'll be what hits 255 first (it's unlikely anything else in the scene will be that reflective) so there's no need to over-expose it - unless it's crappy muslin cloth with wrinkles. Honestly, do yourself a favour and switch to seamless -- you won't look back.
When it's over-exposed that much it's the same as shooting into a light source - and the camera is going to see the same intensity no matter where the model is - so where ever the fine detail is it's still going to have a couple of stops of "nuke" behind it - and that'll cause problems with fine detail every time.I thought contrast was lost due to spillage from over exposed back ground but I will do 1/3 stop higher and any creases will be fixed in PP.
What flashes are you using?I am always at 1/125. I tested lens with a single point focus and It is ok
Lots of ways. What size are they? Do you use gMail?As I am still new here how would I go about sending the RAW file to you
Here's another then, but don't mess with her!I like this one too!
-
1st January 2014, 12:24 PM #17
- Join Date
- Sep 2013
- Location
- Brisbane, Australia
- Posts
- 275
- Real Name
- Dean
Re: School of Portraiture - Links to Lessons 1 through 8
Colin
Happy new year!
I have been quite busy over the Christmas break but still managed to get one shot of my sister and her boy friend.
Please let me know what you think
Regards
Dean

-
4th June 2015, 08:01 PM #18
- Join Date
- Sep 2013
- Location
- Cape Town, South Africa
- Posts
- 21
Re: School of Portraiture - Links to Lessons 1 through 8
Hi Colin
First of all a HUGE thank you, for the time and effort you invest here and sharing your tricks.
On purpose I stopped reading at lesson 2 FOR NOW and would like your opinion on the following picture.
We went on a shoot along the coast to get some wave pics with lighthouse and sunset, when I asked my better half to pose in the sunset. And for a change even my wife likes her own portrait. It is against everything that's said in the first lessons but I guess the exception to the rule comes into play!
I would like, after I went thru the remaining lessons, to put in some more recent portraits and get your input.
For now please, I'd like to hear the possible improvements with what I had ( sunset, open space with no shade)

I DO NOT KNOW WHY BUT THE PICS COMES CUT-OFF ON MY SCREEN
PLS have a look at attachmentsLast edited by guidocoza; 4th June 2015 at 08:13 PM.
-
4th June 2015, 09:45 PM #19

- Join Date
- May 2012
- Location
- Canada (west coast)
- Posts
- 2,087
- Real Name
- Bruce
Re: School of Portraiture - Links to Lessons 1 through 8
Although I'm no expert in portrait photography, I like the image you've posted of your better half. Originally Posted by guidocoza
-
5th June 2015, 11:02 AM #20Moderator

- Join Date
- Mar 2012
- Location
- Ottawa, Canada
- Posts
- 22,499
- Real Name
- Manfred Mueller
Re: School of Portraiture - Links to Lessons 1 through 8
First of all welcome to CiC, Guido. I'm afraid you won't be hearing from Colin, as he is no longer an active member of this site. While my experience level with portraiture is less than Colin's, but I do a fair bit of portraiture (including more formal studio work), so let me try to make some comments on your work. Originally Posted by guidocoza
First of all, I'm happy to hear that your wife likes the image, that's always a good first step. I'd like to look at your shot from three different views; technical camera choices, execution and compositional choices. The three are closely interconnected, so it's hard to completely separate them. The camera metadata lets me see some of these choices.
Camera choices - you are using a long lens (153mm on a 1.6 crop factor camera is the full-frame equivalent of 245mm), so that will give flatten the perspective of your image and give the portrait a pleasing overall look. You are tending a bit on the long side, but that is really up to you. You are also shooting wide open at f/2.8; and given the magnification of the lens, your background in nicely out of focus. The flip side is that this gives you a very narrow depth of field, so focus is critical. ISO 125 will give you good noise performance and good colour depth.
You are using auto white balance, and that can be a bit problematic in this kind of lighting. Sunset lighting tends to be mixed lighting and combines the warm light of the sun near the horizon with the blue light reflecting down from the sky and generally gives a warm tone to images; perhaps too warm with your camera trying to average out these impacts. For portraiture, the skin tones must look right, so getting your while balance. For this type of shot, I will always suggest either shooting RAW or doing a custom white balance using a proper target. The colour temperature can change quite quickly at that time of day, so if you are shooting jpeg, you will have to redo you white balance every few minutes as the sun gets closer to the horizon.
I don't know what autofocus mode you are using, but the image looks a bit soft, especially around the eyes, and given the long focal length / shallow depth of field from shooting wide open, this is critical. The eyes, especially the eye nearest the camera must be tack sharp. I do portraits using a single focus point, focus on the eye nearest the camera and then recompose before pressing the shutter release. I find the various other autofocus modes (matrix) tend to fail with the way you are shooting.
Compositional Choices - Looking at the way the shadows fall, the catch-lights in her eyes and the way your wife is squinting, I suspect the sun is coming in over your left shoulder. It's a bit harsh for my tastes and having her in a bit more shade would probably give an even more pleasing light and would be more comfortable for your subject. While I like shadow detail in portraiture, I prefer it to be a bit more soft subtle. You might find that shooting from a touch higher up (camera positioned 3 - 5cm about your subjects eyes might be a better compositional choice as it will tend to improve the look under the chin.
I also find that you are not filling your frame. There is lots of space above and around your subject. Get closer and fill the frame. Look at the other shots on this thread. The subjects, rather than the background fill the frame; cropping the subject is something to consider too; you don't have to show the whole head.
Consider shooting some of the images in portrait (vertical) orientation, rather than the horizontal landscape orientation you have selected.
Execution - Overall, I find the image a touch soft and tending to the muddy side. I don't know if you are post processing or not or if this is a straight out of camera jpeg. The image looks a bit underexposed and the black and white points appear to be off. I like my portraits to be a bit on the warm side, but this is a bit too much for my taste; bringing the saturation back a bit would help here too.
Regardless, great start, but pay attention to your basic camera settings, lighting and composition, and your images will become even stronger!

 Reply With Quote